OpenHab and Node-RED Controlled Christmas Lights

Introduction
I used to use some old X10 hardware to remotely control my external Christmas lights, but this year the RF remote was dead and I decided the automation side of the Christmas fun needed an upgrade
After a quick survey of available options (I have some KMP Electronics hardware Lying around, namely some Prodino Ethernet and some Prodino WROOM Esp8266 ) that require separate low power voltage wiring to function I decided I needed something simpler, that could withstand being stuff in a wall recess without needing a stable electrical panel setup.
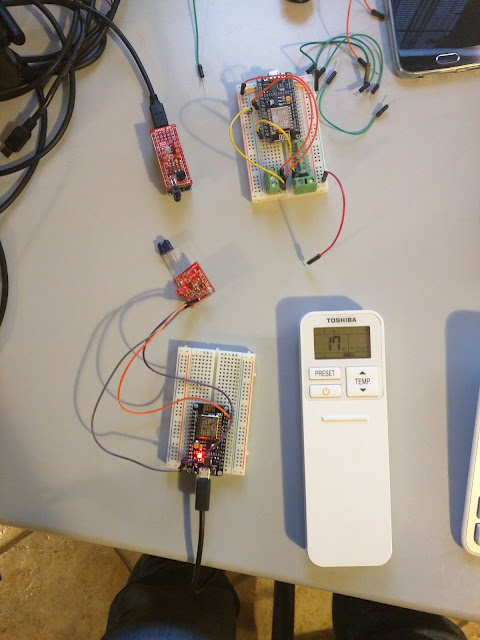
This is a blog post describing how I connected Three Sonoff Basic devices to my existing home automation system to be able to turn them on or off in a manual (Openhab UI) or automated (Node-Red UI) fashion.
Enter the Itead Studio Sonoff Basic

The cool thing about it is that it does not require a separate low power input to enable the remote controlling hardware, and the even cooler part is that there is an open source firmware for it that gets rid of the need for a custom phone app to setup and control it (https://github.com/arendst/Sonoff-Tasmota) and enables communication to a standard MQTT server.
Wiring (Electrical)
Standard Disclaimer: the wiring can't get simpler than this, but it still requires some safety precautions as you will be handling 220v (i.e. potentially lethal). If you don't feel comfortable with it just don't do it.having said that, provided you don't do the wiring with live wires it's dead simple, connect a plug and wire on the input side and connect a socket and wire to the output side:

Sonoff-Tasmota Firmware Upgrade
Once the device is wired, secured and powered on, we will need to update the firmware to get rid of the Itead appliance requirement, in order to do this there are two methods:- Wifi Update: it will require a laptop and following the instructions at https://github.com/mirko/SonOTA
- Serial Update: it will require some soldering, a 3.3V FTDI USB-to-Serial Converter/Programmer, and following the instructions here
i used the Wifi update method, it is much simpler and once you get the hang of it it takes only a couple of minutes. the basic steps of the process are:
- get the SonOta repository from github
- install all the prerequisite software (python3 and accessory libs)
- kick off the sonota.py script
1 2 3 4 5 6 7 8 9 10 11 12 13 14 15 16 17 18 | cuk-lap-51-mbp:SonOTA mrossi$ python3 sonota.py Current IPs: ['172.30.2.225', '172.30.2.224'] Select IP address of the WiFi interface: 0: 172.30.2.225 1: 172.30.2.224 Select IP address [0]: 1 WiFi SSID: MYWIFISSID WiFi Password: mywifipaswd Using the following configuration: Server IP Address: 172.30.2.224 WiFi SSID: MYWIFISSID WiFi Password: *********** Platform: darwin ** Now connect via WiFi to your Sonoff device. ** Please change into the ITEAD WiFi network (ITEAD-100001XXXX). The default password is 12345678. To reset the Sonoff to defaults, press the button for 7 seconds and the light will start flashing rapidly. ** This application should be kept running and will wait until connected to the Sonoff... |
The script will ask for your wifi settings (SSID and password) as it will need to feed them to the Sonoff module during the upgrade phase, make sure you choose the right ip address for your laptop (the one which is used by the laptop to connect to wifi).
Once this is done, press the sonoff button for 7+ seconds, it will reboot and enter firmware upgrade mode (the green led will start flashing quickly).
The sonoff will start a SSID with the name starting with WIFI-xxx, disconnect your laptop from your wifi and connect it to the new SSID (password:12345678).
Once this is done, the process will kick off again:
1 2 3 4 5 6 7 8 9 10 11 12 13 14 15 16 17 18 19 20 21 22 23 24 25 | ......Current IPs: ['172.30.2.225'] ....Current IPs: ['172.30.2.225', '10.10.7.2'] ~~ Connection attempt >> HTTP GET /10.10.7.1/device << { "deviceid": "10001f2ce3", "apikey": "ae37f2dc-c0d3-4efd-8cb0-ac82bbc68ff5", "accept": "post" } >> HTTP POST /10.10.7.1/ap >> { "version": 4, "ssid": "MYWIFISSID", "password": "***************", "serverName": "172.30.2.224", "port": 8443 } << { "error": 0 } ~~ Provisioning completed Starting stage2... ** The IP address of <serve_host> (172.30.2.224) is not assigned to any interface on this machine. ** Please change WiFi network to MYWIFISSID and make sure 172.30.2.224 is being assigned to your WiFi interface. ** This application should be kept running and will wait until connected to the WiFi...
|
This will allow the Sonoff to retrieve the right WIFI settings to connect to your home WIFI, once this is complete, reconnect the laptop to your home WIFI and the process will continue:
1 2 3 4 5 6 7 8 9 10 11 12 13 14 15 16 17 18 19 20 21 22 23 24 25 26 27 28 29 30 31 32 33 34 35 36 37 38 39 40 41 42 43 44 45 46 47 48 49 50 51 52 53 54 55 56 57 58 59 60 61 62 63 64 65 66 67 68 69 70 71 72 73 74 75 76 77 78 79 80 81 82 83 84 85 86 87 88 89 90 91 92 93 94 95 96 97 98 99 100 101 102 103 104 105 106 107 108 109 110 111 112 113 114 115 116 117 118 119 120 121 122 123 124 125 126 127 128 129 130 131 132 133 134 135 136 137 138 139 140 141 142 143 144 145 146 147 148 149 150 151 152 153 154 155 156 157 158 159 160 161 162 163 164 165 166 167 168 169 170 171 172 173 174 175 176 177 178 179 180 181 182 183 184 185 186 187 188 189 190 191 192 | ~~ Starting web server (HTTP port: 8080, HTTPS port 8443) ~~ Waiting for device to connect *** IMPORTANT! *** ** AFTER the first download is COMPLETE, with in a minute or so you should connect to the new SSID "FinalStage" to finish the process. ** ONLY disconnect when the new "FinalStage" SSID is visible as an available WiFi network. This server should automatically be allocated the IP address: 192.168.4.2. If you have successfully connected to "FinalStage" and this is not the IP Address you were allocated, please ensure no other device has connected, and reboot your Sonoff. ..<< HTTP POST /dispatch/device >> /dispatch/device >> { "error": 0, "reason": "ok", "IP": "172.30.2.224", "port": 8443 } 200 POST /dispatch/device (172.30.2.243) 4.25ms 101 GET /api/ws (172.30.2.243) 1.71ms << WEBSOCKET OPEN << WEBSOCKET INPUT << { "userAgent": "device", "apikey": "ae37f2dc-c0d3-4efd-8cb0-ac82bbc68ff5", "deviceid": "10001f2ce3", "action": "register", "version": 2, "romVersion": "1.5.5", "model": "ITA-GZ1-GL", "ts": 744 } ~~~ device sent action request, acknowledging / answering... We are dealing with a ITA-GZ1-GL model. ~~~~ register >> { "error": 0, "deviceid": "10001f2ce3", "apikey": "8d8971f4-73a0-4e00-ab7d-24f887a0bdbf", "config": { "hb": 1, "hbInterval": 145 } } << WEBSOCKET INPUT << { "userAgent": "device", "apikey": "8d8971f4-73a0-4e00-ab7d-24f887a0bdbf", "deviceid": "10001f2ce3", "action": "date" } ~~~ device sent action request, acknowledging / answering... ~~~~ date >> { "error": 0, "deviceid": "10001f2ce3", "apikey": "8d8971f4-73a0-4e00-ab7d-24f887a0bdbf", "date": "2017-12-11T15:06:45.008Z" } << WEBSOCKET INPUT << { "userAgent": "device", "apikey": "8d8971f4-73a0-4e00-ab7d-24f887a0bdbf", "deviceid": "10001f2ce3", "action": "update", "params": { "switch": "off", "fwVersion": "1.5.5", "rssi": -82, "staMac": "68:C6:3A:95:45:00", "startup": "off" } } ~~~ device sent action request, acknowledging / answering... ~~~~ update >> { "error": 0, "deviceid": "10001f2ce3", "apikey": "8d8971f4-73a0-4e00-ab7d-24f887a0bdbf" } >> { "action": "update", "deviceid": "10001f2ce3", "apikey": "8d8971f4-73a0-4e00-ab7d-24f887a0bdbf", "userAgent": "app", "sequence": "1513001205025", "ts": 0, "params": { "switch": "off" }, "from": "hackepeter" } >> { "action": "update", "deviceid": "10001f2ce3", "apikey": "8d8971f4-73a0-4e00-ab7d-24f887a0bdbf", "userAgent": "app", "sequence": "1513001205027", "ts": 0, "params": { "switch": "on" }, "from": "hackepeter" } >> { "action": "update", "deviceid": "10001f2ce3", "apikey": "8d8971f4-73a0-4e00-ab7d-24f887a0bdbf", "userAgent": "app", "sequence": "1513001205029", "ts": 0, "params": { "switch": "off" }, "from": "hackepeter" } >> { "action": "update", "deviceid": "10001f2ce3", "apikey": "8d8971f4-73a0-4e00-ab7d-24f887a0bdbf", "userAgent": "app", "sequence": "1513001205030", "ts": 0, "params": { "switch": "on" }, "from": "hackepeter" } >> { "action": "update", "deviceid": "10001f2ce3", "apikey": "8d8971f4-73a0-4e00-ab7d-24f887a0bdbf", "userAgent": "app", "sequence": "1513001205035", "ts": 0, "params": { "switch": "off" }, "from": "hackepeter" } >> { "action": "upgrade", "deviceid": "10001f2ce3", "apikey": "8d8971f4-73a0-4e00-ab7d-24f887a0bdbf", "userAgent": "app", "sequence": "1513001205040", "ts": 0, "params": { "binList": [ { "downloadUrl": "http://172.30.2.224:8080/ota/image_user1-0x01000.bin", "digest": "1c467a7cb4058df22046ffbc0312272aed324a74e91b9b39e1bf2aef88eeca8a", "name": "user1.bin" }, { "downloadUrl": "http://172.30.2.224:8080/ota/image_user2-0x81000.bin", "digest": "804e4f4a2316fbcc2c6b46aff53c24b9be252bf3fd8cf3ea2243e4475a052658", "name": "user2.bin" } ], "model": "ITA-GZ1-GL", "version": "23.42.5" } } << WEBSOCKET INPUT << { "userAgent": "device", "apikey": "8d8971f4-73a0-4e00-ab7d-24f887a0bdbf", "deviceid": "10001f2ce3", "action": "query", "params": [ "timers" ] } ~~~ device sent action request, acknowledging / answering... ~~~~ query >> { "error": 0, "deviceid": "10001f2ce3", "apikey": "8d8971f4-73a0-4e00-ab7d-24f887a0bdbf", "params": 0 } .Sending file: /ota/image_user2-0x81000.bin 206 GET /ota/image_user2-0x81000.bin?deviceid=10001f2ce3&ts=1270216262&sign=d546f46f231d699e76f1db669b618059c7f079621f0956cd99a942d7602757f7 (172.30.2.243) 11.67ms ------>Snipped long list of Get commands << WEBSOCKET INPUT << { "error": 0, "userAgent": "device", "apikey": "8d8971f4-73a0-4e00-ab7d-24f887a0bdbf", "deviceid": "10001f2ce3", "sequence": "1513001205040" } ~~~ device acknowledged our action request (seq 1513001205040) with error code 0 |
At this stage the Sonoff will reboot, and set up yet another SSID named FinalStage, once that is available connect the laptop to that SSID and the process will continue:
1 2 3 4 5 6 7 8 9 10 11 | ................Current IPs: ['172.30.2.225'] .Sending file: /ota/image_arduino.bin .Current IPs: ['172.30.2.225', '192.168.4.2'] The "FinalStage" SSID will disappear when the device has been fully flashed and image_arduino.bin has been installed. If there is no "Sending file: /ota/image_arduino.bin" log entry, ensure all firewalls have been COMPLETELY disabled on your system. ....200 GET /ota/image_arduino.bin (192.168.4.1) 9720.71ms ......Current IPs: ['172.30.2.225'] No longer on "FinalStage" SSID, all done! Now connect to the sonoff-#### SSID and configure for your WiFi (it will not be configured). Quitting. |
This is the final stage that uploads the Tasmota firmware to the Sonoff, once it is complete it will reboot yet again.
It should already start in initial config mode and setup another SSID names sonoff-xxxx, if not press the Sonoff button 4 times in quick succession and the green led should start blinking rapidly and the new SSID should be available
Connect to the new SSID and open a webpage to http://192.168.4.2 , you will be presented with the Wifi configuration page

Insert the appropriate wifi parameters and the module will reset once again and join your wi-fi network, You'll need to check on your device that dishes out IP addresses what ip you will need to use to connect to it (in my case: 172.30.2.238)

We are interested in the Configuration->Configure MQTT part, where we will fill in all details of the MQTT server (ip, authentication if needed, topic and full topic name)

Once configured properly, the device will send status updates to the MQTT broker on the sonoff/stat/sonoff01/ topics, send telemetry data to the sonoff/tele/sonoff01/STATE topic and subscribe to commands sent on the sonoff/cmnd/sonoff01/POWER topic (ON - OFF).
The Sonoff will send updates to the status topic if the physical button is pressed to trigger the relay manually.
This is an example of sending an ON and OFF command to two devices (sonoff01 and sonoff02)
Dec 13 15:18:13 sonoff/tele/sonoff01/LWT Online
Dec 13 15:18:13 sonoff/tele/sonoff02/LWT Online
Dec 13 15:18:13 sonoff/tele/sonoff03/LWT Offline
Dec 13 15:18:13 sonoff/cmnd/sonoff01/POWER OFF
Dec 13 15:18:13 sonoff/cmnd/sonoff02/POWER OFF
Dec 13 15:18:13 sonoff/cmnd/sonoff03/POWER OFF
Dec 13 15:18:30 sonoff/cmnd/sonoff01/POWER ON
Dec 13 15:18:30 sonoff/stat/sonoff01/RESULT {"POWER":"ON"}
Dec 13 15:18:30 sonoff/stat/sonoff01/POWER ON
Dec 13 15:18:31 sonoff/cmnd/sonoff02/POWER ON
Dec 13 15:18:31 sonoff/stat/sonoff02/RESULT {"POWER":"ON"}
Dec 13 15:18:31 sonoff/stat/sonoff02/POWER ON
Dec 13 15:18:32 sonoff/cmnd/sonoff03/POWER ON
Dec 13 15:18:33 sonoff/cmnd/sonoff01/POWER OFF
Dec 13 15:18:33 sonoff/stat/sonoff01/RESULT {"POWER":"OFF"}
Dec 13 15:18:33 sonoff/stat/sonoff01/POWER OFF
Dec 13 15:18:34 sonoff/cmnd/sonoff02/POWER OFF
Dec 13 15:18:34 sonoff/stat/sonoff02/RESULT {"POWER":"OFF"}
Dec 13 15:18:34 sonoff/stat/sonoff02/POWER OFF
Dec 13 15:20:17 sonoff/tele/sonoff01/STATE {"Time":"2017-12-13T16:20:17", "Uptime":49, "Vcc":3.147, "POWER":"OFF", "Wifi":{"AP":1, "SSId":"ESP", "RSSI":70, "APMac":"82:2A:A8:8A:D9:74"}
Openhab - Sonoff
Once this is tested and working we can start working on the Openhab side, I will not go into the details of connecting openhab to the MQTT broker (you can have a look here: https://github.com/openhab/openhab1-addons/wiki/MQTT-Binding for details)
We need to add the relevant Items to the openhab config:
items/default.cfg
Switch  XmasLight "Xmas Light" {mqtt=">[mosquitto:sonoff/cmnd/sonoff01/POWER:command:*:default],<[mosquitto:sonoff/stat/sonoff01/POWER:state:default]" }
Switch  XmasLightReachable " "  {mqtt="<[mosquitto:sonoff/tele/sonoff01/LWT:state:MAP(reachable.map)]" }
Number  XmasLightRSSI "Xmas Light: RSSI [%d %%]" {mqtt="<[mosquitto:sonoff/tele/sonoff01/STATE:state:JSONPATH($.Wifi.RSSI)]" }
The minimum amount of config is the main switch (XmasLight) with the proper input and output topics, additional config items can be added to monitor wifi signal and availability of the node.
We can use this new Item in a sitemap:
        Frame label="Xmas" icon="xmas"{
                Switch item=XmasLight
                Switch item=XmasLight2
                Switch item=XmasLight3
        }
And it will create a switch in openhab that will be able to control the Sonoff from the UI:

Here is a log from openhab when triggering the relay from the UI:
15:31:45.129 DEBUG o.o.i.t.m.i.MqttBrokerConnection[:437]- Publishing message 206 to topic 'sonoff/cmnd/sonoff01/POWER'
15:31:45.309 DEBUG o.o.i.t.m.i.MqttBrokerConnection[:437]- Publishing message 207 to topic '/openHAB/out/XmasLight/command'
Node-Red, Timers and Toggle
Now, what is the point of being able to trigger remotely some lights and not do it based on a timer, or on group of items?My preferred tool for these kind of tasks is Node-Red , a NodeJs based visual programming environment. I could have used OpenHab to do this, but since I already have Node-Red up and running and supporting other automation tasks that would be really hard to implement in OpenHab, and since I hate OpenHab docs and programming style, this is what you are going to get on my blog post :)
Node-red is a flow-based programming tool, original developed by IBM’s Emerging Technology Services team and now a part of the JS Foundation. What I like about it is the simplicity of using it and the broad availability of input and output modules, that save you the hassle of reinventing the wheel each and every time. It is NodeJs based, so whatever code you are going to write will be in Javascript, and it runs inside the NodeJs loop, so all is designed around its Event Driven Paradigm
A Flow in NodeJs is what can be called a program/script/module in a traditional programming environment. A flow is composed by combinations of these basic blocks:
- inputs
- outputs
- functions
All these basic blocks can be augmented to provide specific functionality, like an mqtt-input or an mqtt-output block.
The flow that controls my Christmas lights performs the following functions:
- A toggle that inverts the current state of all my Sonoff modules
- A timer that turns on the lights at 4:30 and turns them off at 0:30 every day

The flow also monitors state changes from external entities (Openhab, manual trigger) to be able to decide when it needs to perform an action
the Timer function is implemented in this part of the flow:

The BigTimer module is where all the action happens, it is configured to send an ON message every day at 15:30UTC and an OFF message at 23:30UTC

The payload generated by the BigTimer node (ON and OFF strings) is fed to a function node that sets the proper topics for the three Sonoff devices I am controlling:


The function sets the proper MQTT topic for each Sonoff device, and updates all global state variables that are used in other parts of the flow (specifically, the TOGGLE )
Once its job is done, the function outputs the resulting payloads :
{
 "topic": "sonoff/cmnd/sonoff01/POWER",
 "payload": "ON",
 "qos": 0,
 "retain": false,
 "_msgid": "e97c2b29.1683d8"
}
to the MQTT output node, whose job is to post the payload (in this example ON) to the configured MQTT topic (in this case sonoff/cmnd/sonoff01/POWER )
The other parts of the flow implement a toggle for all the switches, and subscribe to the /stats/ topic of the Sonoff devices to update state changes in the global variables
Conclusion
All this jumping between technologies, programming styles and hardware only to be able to turn on and off a couple of lights may seem overkill, and it probably is, but given that all the infrastructure except the Sonoff devices was already in place and given previous experience with all the topics involved, it took me less than 4 hours to do the electrical wiring and all the necessary changes to the tools. It was time well spent and got me learning some more things about a lot of different technologiesPS: Node-Red is really cool
I realized while writing this post that I never blogged about the other things I am using Node-red for, namely:- A home automation alerting system that monitors sensor data collection and other events (like flood pumps kicking in) and sends alerts when needed
- Fetching Weather Data from Weather Underground and pushing it to Openhab and Emoncms (my energy monitoring system)
These are the flows that achieve this functionality, I'll try and find the time to blog about them:


... to be continued

Commenti
Posta un commento